I got my hands on a MacBook
The new M1 Macbooks are wonderful computing beasts and got me really intrigued. It prompted me to borrow a MacBook from a friend to use over a weekend. Because I had to convince myself beyond any doubt that it was the right machine for me before I spend a fortune to buy one.
During that weekend I used the machine for more than 30 hours. I only had 8 hours of sleep over that weekend. During my relentless testing and research, I learned a lot about macOS and found some neat tricks and amazing apps. Even though my findings are mainly aligned to my use case, I thought some of you might also find a thing or two that you can use, hence sharing it here. One might wonder whether 30 hours of use would enable me to write a credible article on advanced macOS use. I had used macOS for about 5 years before I completely switched to Linux, and I play with different OS and software as a hobby.
The majority of the Apps that I highlight below are free. I have explicitly marked the Paid Apps.
Why Should You Customize Software?
All good software is designed and developed to cater to their ideal user. The developer makes their best effort to make the software enjoyable, functional and usable by the majority of its userbase.
Therefore, if you consider software that is used by a generic user-base (Eg. operating systems such as Mac OS, Windows, Android and software suites such as Microsoft office), its basic configuration (out-of-the-box experience) is designed to be easier to use for its most basic user. At the same time, they try to make it appealing to advanced users by enabling customizability. Therefore, if you are using any software in its default configuration, it’s most likely that you’re compromising the functionality and your productivity by downgrading your workflow to that of a basic user level.
I believe that I have sufficiently convinced you that all software requires some form of customization to get the maximum use for one’s specific use case. If I share my personal experience, I almost always customize everything that I use to my use case. (A word of caution, if you do it too much you can break things too, and I do that very frequently). I’ve written several articles on different ways I’ve customized my workflows.
- How I have developed my own key-map, to use the computer keyboard with maximum productivity. Read the article here.
- How I have customized my workflow in Linux to best suit my needs. Read the article here.
- How I customize my web browser for the best privacy and security. Read the article here.
Base Installation
As any IT person would do, I didn’t want to affect any of my friend’s setup. So I created a new user for myself.
First I installed Homebrew, which is a terminal-based package manager for Mac. With this, you can install almost all the applications that I am going to talk about with a single command. `homebrew install
Key-map
My next task was to replicate Capsy for macOS. Capsy is the key-map I developed to improve the productivity of my keyboard use in Windows. You can read more about Capsy and how and why I created my own keymap here. I could easily achieve this with software called Karabiner Elements. This software provides an easier way to customize using a Graphical User Interface. You can either create your own keymap or download popular keymaps from the Karabiner Elements website. For instance, anyone would want to put the CapsLock key to good use by mapping it to either the Escape or Control key. In case anyone is interested, I’ve shared my config file where I implemented Capsy here.
Terminal
The next task was customizing the terminal, as I used the terminal for most tasks. You can skip this section if you are not planning to use the terminal. My objective was to replicate my Linux terminal environment on Mac. In macOS, zsh is the default shell. I installed iterm2 which is a terminal with better customization.
- Installed iterm2 and changed the key mappings via `Preferences > profile > keys > keymapping > presets > natural keys`
- Installed ohmyzsh (ohmyzsh adds functionality to zsh)
- Installed Tmux (Tmux is a terminal multiplexer) and copied my tmux config files .tmux.conf to the home folder.
- Installed Vim (Vim is a modal text editor). Then installed vimplug which is a VIM plugin manager and copied my Vim configuration file..vimrc
Getting the Basics Right
Browser: Next a browser. Installed Brave browser and configured it for maximum privacy. You can read more about why you should use a privacy-respecting browser and its benefits in my previous article here.
Text Editor/IDE: I needed a good text editor with basic IDE functionality to edit my configs. I installed VSCode.
Launcher: Mac is already far ahead of Windows in this department. You have Spotlight. However, Alfred(PAID) is a better alternative. With its PowerPack it provides a significant efficiency boost. I would happily pay for this software if I ever buy a mac. Raycast is an upcoming Free alternative for Alfred. Space Launcher is another alternative launcher where you can launch apps with the Spacebar. However, since I implemented this functionality with my Karabiner config, it was not necessary for me. But some of you might find it interesting.
Task Switcher: I didn’t like the way MacOS displays the opened apps in the task switcher. It displayed the open apps instead of open windows. For instance, if Excel has multiple files open, you will first have to switch to Excel with `COMMAND+TAB` and then use `COMMAND+tilde` to switch to the correct window. I installed Alt-Tab. This provides windows-like alt-tab functionality. ie. If there are different windows of the same app, it shows them separately. Within this app, I changed the view mode to Windows 10 and remapped the keyboard shortcut to `COMMAND+tab` and `COMMAND + ``
Shortcuts: Since I was using macOS after a few years, I couldn’t remember some keyboard shortcuts. As you would have realized by now, I live on the keyboard. I prefer using the keyboard for everything over the mouse. I installed Cheatsheet. This enables the user to view and access all keyboard shortcuts for an app by holding the `COMMAND` key.
Clipboard Manager: Clipboard manager is an essential component of my workflow. Clipboard managers keep a history of things that you copied before so that you can paste something you copied prior to the last one. I installed Maccy. This is a clipboard manager with clipboard history. I enable automatic pasting so that I can directly paste them to the active windows instead of copying the selection to the clipboard and then pasting again.
Password manager: I don’t reuse any of my passwords and no one should. And you can’t practically remember multiple complex passwords. Password managers are the solution. For this, I installed KeepassXC. I also have Bitwarden in my browser as a backup.
PDF Reader: I wanted a good PDF reader. I installed Skim. This provides some additional functionality such as easier annotations etc. The default macOS preview is also a good alternative.
Window Management
One of the key issues that slow me down in an OS is Window Management. Using the mouse to move or resize every window will significantly slow me down. I want to use keyboard shortcuts or touchpad gestures for that.
- To manage the application windows with the keyboard I found Rectangle. There is a popular paid alternative called Magnet. But I couldn’t find anything that Magnet offers more than Rectangle. Hence, I wouldn’t recommend buying Magnet.
- To manage application windows with touchpad gestures I installed Swish. This is a paid app. But if I ever purchase a Mac, this would be one of the first few that I will purchase. This gave me an immediate efficiency boost. Penc is a free alternative for this.
- I also checked out some tiling window managers. But they are not as optimized as the mainstream Linux tiling window manager such as i3, dwm, bspwm etc. The ones that I used were Amethyst and Yabai(with skhd). Watch this video for a quick glimpse of the use of tiling window managers.
App Management:
Since I will be installing and removing many apps to test them out, I needed a tool that can cleanly remove installed apps. Because most apps tend to leave some configuration files behind even after they are uninstalled. For this, I installed Appcleaner. This app deletes the leftovers when I remove an app. Clean my Mac is a popular paid alternative for this and it has some added advanced functionality.
I also installed Clean-me. This cleans the caches, temp files etc. At one time this cleaned about 2GB of temp files. So it is worth using this app on your system from time to time to claim back some exorbitantly expensive apple storage.
I wanted a way to keep the installed Apps up-to-date. With homebrew, this was just one command away. However, if you’re not using the terminal you can install Latest which is a GUI app that checks and updates all the installed Apps at once.
Menubar
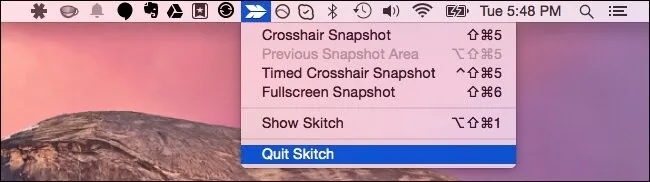
The menubar is a key component of the macOS. Optimizing menubar real estate and getting the maximum use of it was a priority. So I did the below.
- Installed Dozer. This optimizes the menu bar space. Bartender is a better app than this. However, it is a paid app. I might pay for Bartender given that the menu-bar real-estate in macOS has become so precious with the introduction of the Notch in new MacBooks.
- Installed Stats which is a performance stats monitor that sits on the menubar. istatmenu is a better alternative. But it is paid software. I would not pay for it.
- Enable battery percentage in the battery icon. This should be activated by default in my opinion. `System Preferences > Dock and Menu Bar > Battery > Enable Battery Percentage
Customizing Finder and some Finder tips
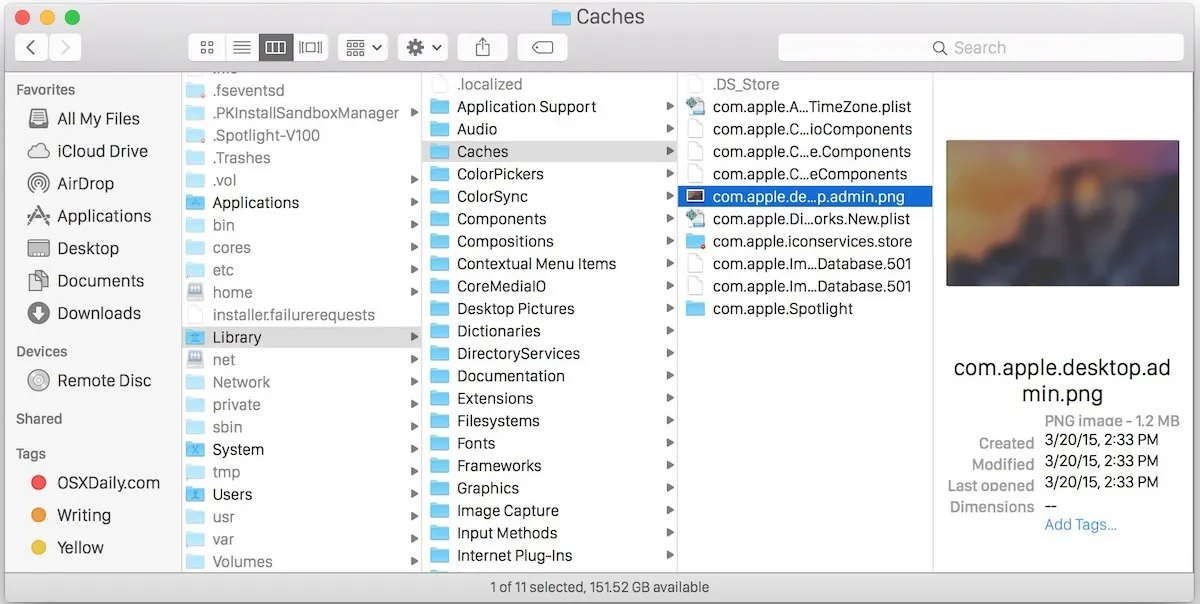
Finder is the default file manager of Mac-OS. This is far better than windows explorer. In any OS you will be spending a lot of time in a file explorer. You can improve the functionality of Finder with the below configs and tips.
- Go to Finder preferences and do the below changes. If it’s difficult to find the relevant settings, please do a quick web search.
- Make the folders come on top of the files list. This is a more familiar view if you’re coming from Windows. Finder > Preferences > Advanced > Show folders at the top
- Enable `show all file name extensions. Also, you can quickly show/hide hidden files in the Finder by clicking `SHIFT + COMMAND + PERIOD `
- Enable the status bar by Finder > View > Show Status Bar. This shows more useful information in a bar at the bottom of the window.
- Enable path bar by Finder > View > Show Path Bar. This enables you to quickly switch to any folder in the folder path.
- Customize the toolbar at the top by changing the icons in the toolbar by right-clicking. Also, you can add frequently used folders and apps to the toolbar. For instance, if you are a person who’s embedded in the Apple ecosystem and use AirDrop frequently, add the airdrop icon to the toolbar.
- Make folders open in new tabs instead of new windows by Finder > Preferences > General > Uncheck “Open folders in tabs instead of new windows”
- Make Finder open a folder of your choice when it is opened. By default, it launches into the “Recents” which is less useful. Finder > Preferences > General > New Finder windows show “Documents”
- Remove unnecessary tags from Finder by Finder > Preferences > Tags > Uncheck those you don’t use
- Change the Finder search to search in the current folder instead of the whole drive. This will make search performance much faster. Finder > Preferences > Advanced > Search the Current Folder when performing a search
- In the multi-column view, you can easily resize all columns equally by holding the `OPTION` when you resize.
File Operations: Below are some tips on using some file operations.
- Drag and drop copying –> copy to the parent folder by dropping into the info columns in the detailed view
- Click on the expand icon of a folder holding `OPTION` to expand all child folders
- `COMMAND`+`OPTION` to create a folder alias
- `OPTION`+drag to quickly copy a file or folder
- `OPTION`+click to expand all child folders
- `COMMAND`+`i` while selecting a file to change the default app to open with
- To easily reduce the file size of an image file whilst keeping the proportions the same, Open an image in preview > Markup > Edit size and you can change the size
- Easily Convert multiple images into a single PDF file by selecting multiple images > Right click > Quick actions > Create PDF (you can move the pages around)
- To do the reverse, ie convert a PDF file page into multiple images, Open PDF > File > Export as PNG or JPEG
- Keynote presentations can be exported as a PPT file, Numbers can be exported as Excel files, and Pages as Word Doc files
- In the Finder app, you can do multi-renaming files with ease, based on different criteria. Select all files, right-click and select rename.
- By default, in macOS, there is only copy-paste. There is no cut-paste. To do cut-and-paste, first copy the file and then press `OPTION` + `COMMAND` + `v` at the destination.
- You can easily access the Finder panels faster with keyboard shortcuts. With Shift+Command+a > Applications, Shift+Command+o > Documents, Shift+Command+p > show file preview on the right side
Screenshots
Apple native Screenshots App is pretty good. There are different key combinations that will address most of the functions of a great screenshot app.
- `Shift+COMMAND+3` to capture Full Screen
- `Shift+COMMAND+4` to screenshot a selection
- `Shift+COMMAND+4` and then press space to take a picture of a window
- `Shift+COMMAND+4` and then press and hold space to move the selection
- `Shift+COMMAND+4` and then press and hold COMMAND and/or OPTION to enable resizing of the screenshot region.
- `Shift+COMMAND+4` and then space and then click whilst holding `OPTION` to screenshot without the formatting and shadows
- `Shift+CTRL+COMMAND+4` to copy the screenshot to the clipboard without saving it to the screenshot folder.
- `Shift+COMMAND+5` to capture and record the screen.
There are some alternatives to native screenshot tools such as Skitch. This allows you to easily do annotations on the screenshots.
Other Configuration
Dock Configuration:
- Move the Dock to the left or right side. You can drag the dock from the separator vertical line while holding down “Shift” to quickly move the dock around. With widescreen displays, having the dock at the bottom is a waste of screen real estate. You can right-click on the vertical line within the dock to quickly get to Dock Preferences.
- I didn’t like having the recent apps using my dock space. I cancelled this by going into dock preferences and unticking `show recent apps in the dock`.
- The reason I didn’t like the autohide all this time was because of the time it takes to appear when I move the mouse cursor there. But I learnt that you can remove animation and make the delay zero seconds. You can either use the Tinker Tool or use a terminal command.
- To toggle the dock quickly you can use Opt+COMMAND+D.
- If you use AirDrop a lot, you can add it to the dock. Then you can just drag and drop any files directly to the dock. To do this go to Finder > press Shift+COMMAND+G > paste this: /System/Library/CoreServices/Finder.app/Contents/Applications/ > drag AirDrop icon into Dock
Touchpad configuration: Apple MacBooks have no competition for their touchpads. They make the best touchpads in the industry. You can improve its functionality more with the below tips.
- First, enable tap to click in touchpad settings.
- Then enable three-finger drag. This feature is hidden in accessibility settings. When you enable this you can use three-finger drag instead of click-hold-drag.
- Increase the tracking speed. By default, the tracking speed is too slow.
Display Settings:
- Enable the night shift in the display. This automatically activates the nighttime brightness based on the time to reduce blue light strain during nighttime. This is a must-have for your well-being and for a good night’s sleep.
- Disable true-tone in display settings. This disables mac from adjusting the screen colours depending on the lighting condition of the environment.
- In display settings change it to Scaled and then select “more space”. This makes text smaller, but significantly improves productivity due to more space.
Desktop Settings:
- Right-click on the desktop and enable stacks. This immediately unclutters the desktop.
- Activate hot corners in `Desktop and screensavers > screen saver > hot corner`. This enables you to activate certain functions by just moving the mouse cursor to the corners of your screen. The issue with this is that you tend to accidentally activate hot corners quite often. So I made it get activated if I move the cursor to a corner whilst holding the COMMAND key. To activate it in the dropdown menu select the action while holding the modifier. details
Keyboard Settings:
- Enable key repetition. By default, when a key is held, it types a special character instead of repeating the key. You can either use the Tinker-Tool or terminal as below.
defaults write -g ApplePressAndHoldEnabled -bool false

To revert to default do

defaults write -g ApplePressAndHoldEnabled -bool true`
- Shorten the `delay until repeat keys`. This increases the repetition speed.
- Enable `F1`, and `F2` keys without pressing the `fn` keys (in Preferences > keyboard). By default, the extra functionality such as brightness, and volume are activated with Function keys.
- Swap the function and Control keys. If you are coming from windows, this would significantly help. `Keyboard > Modifier keys > Swap Fn and Ctrl keys`
- Enables better keyboard navigation in dialogue boxes by Preferences > keyboard > shortcuts > enable “use keyboard navigation to move focus between controls”
Other Tips
- You can drag windows under the currently active window without losing its focus if you hold the `COMMAND` key while moving the window below. Then the below window will not come to the top. It will move behind the active window
- You can show a custom message on the lock screen. eg. Have your mobile number or email in here. So if you left your mac somewhere and if a good samaritan finds it, they can inform you. Do this by Preferences > security and privacy > (unlock admin) > set lock message
- You can easily Cancel/decline Dialog boxes in macOS with `COMMAND + PERIOD` shortcut.
- Use “Photo Booth” to check how you look before zoom meetings. Alternative is handmirror.
- Go to printers and drag the required printer to the desktop. Then drag any document to the printer icon for a quick print. This will quickly print the document without any other dialog boxes.
- Quicklook is another great feature that macOS natively has but Linux and Windows don’t. This enables you to quickly preview any file by pressing the space key. To improve its efficiency further, when using the QuickLook instead of pressing the space key hold it. Then when you let go of it, QuickLook will close automatically. Quite useful if looking at multiple files quickly.
- When pasting text paste with `Shift+Option+Command+V` to paste as text without any formatting.
- Hold the `COMMAND` key and drag and drop menu bar icons outside to remove them. Can only be done for some icons.
- You can enable word completion in typing by pressing the `F5` key. This shows a drop-down of word auto-completion. If you’re not sure about any spelling or too lazy to type a long word, this is a handy tool to use.
- There are a few ways that you can force quit apps in macOS. Option 1 - Use Activity Monitor. Option 2 - COMMAND+OPTION+ESC. Option 3 Right-click on the app in the dock whilst holding the OPTION key.
Will I buy a MacBook?
If you are still reading the article, you might be interested to know whether I decided to buy a MacBook. Not really.
It doesn’t provide me with any benefit over my 10-year-old HP laptop with Linux on it. So I couldn’t justify paying ~20 times for the same value.
However, neither Linux nor Windows can match the user experience of macOS. There were no lags or slow-downs. It just works. Though I thoroughly enjoyed using it, it didn’t offer me anything more than Windows or Linux apart from the cool factor. I might one day buy a used MacBook for a price less than AUD 400. You can buy a good MacBook pro with a model later than 2015, within that budget.
First published on LinkedIn.